In this webinar, Jordyn Sattler, UW–Madison Extension regional crops educator, explains the importance of identifying nutrient deficiencies, how to recognize key symptoms like chlorosis, necrosis, and stunting, and how to use tools like NDVI imagery and plant tissue sampling for accurate diagnosis.
In this video, Jordyn Sattler, Regional Crops and Soils Educator, provides a comprehensive overview of scouting for crop nutrient deficiencies as part of the Foundational Crop Scouting Training series.
Jordyn also explains how to distinguish nutrient issues from look-alike problems such as herbicide damage or insect injury, and emphasizes effective communication of field observations to agronomists and farmers.
Resources
Transcript
0:05
Hi everyone, welcome to the third sessional of Foundational Crop Scouting Training.
0:11
My name is Jordan Sattler.
0:12
I’m the regional crops and soils educator for Grant Green, Iowa and Lafayette counties.
0:17
I’ll be providing you with an introduction to scouting for crop nutrient deficiencies today.
0:23
Please bear with me.
0:24
I had a cold a couple weeks ago and my voice is struggling to recover.
0:29
Hopefully it makes it through OK, but if at any point you can’t quite hear me at times, let me know and I’ll I’ll try my best to repeat it.
0:37
But thanks for joining us.
0:41
So now on to our topic for the day.
0:43
We’re going to be talking about scouting for nutrient deficiencies, why this is important to be looking for a review of the scouting process, and how to incorporate the information from satellite imagery, some of the important nutrients for crop growth and symptomology that indicates that there could be deficiencies.
1:03
How to properly diagnose A nutrient deficiency, and how to communicate your field observations to the agronomists or farmers that you’re working with.
1:15
As you may have heard in our previous webinars and you’ll continue hearing throughout the rest of the series, there’s a lot of things going on in the field that we need to be looking at when we’re scouting.
1:26
Nutrient deficiencies are just one of many things, but they’re very important.
1:31
Just like food is important to us, nutrients are critical to crop growth, yield, and quality.
1:37
Nutrient deficiencies can reduce crop yield by at least 25%, which directly reduces income for the farmer.
1:46
If we don’t see the symptoms and take corrective action, we’re also going to continue depleting the soil and impact future crop yields.
1:55
So it’s really important that we accurately diagnose these problems so we can manage them effectively.
2:02
Hopefully a lot of you were on the first Lunch and Learn of the series, but if not, that’s OK.
2:08
That recording is up on the Foundational Crop Scouting Training website under the webinar section, so you can go back and check it out later.
2:17
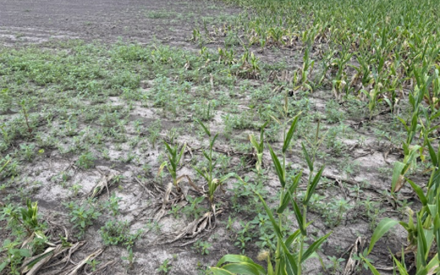
I’d like for everybody to take a few seconds and think about how you would scout this field on the screen.
2:25
What route would you take to walk across the field?
2:34
For me, I’d probably do something like this.
2:37
I’m going to park here along this field lane to make sure I’m out of the way of any trucks or other equipment that’s needing to get around the farm.
2:48
I’m also making sure I’m going to get good coverage of the field using kind of a, a modified W pattern to accommodate the shapes of the fields and the fact that I’ll need to get back to my truck.
3:03
Now, how would you change that if you were going to use an ATV to scout?
3:08
We can’t drive across the rows in those situations, so we want to kind of modify our path to go with the rows.
3:17
So a bunch of up and down trips.
3:19
So I’ll start here at the truck, go around the field edge and then make several trips up and down the field with rows, but making sure that we get really good coverage because using an ATV can often save you time.
3:36
So we want to invest that back into the field, making sure we’re going to see everything that we need to see me erase that a lot.
3:51
But what if we have NDVI imagery of the field?
3:55
This technology has become very commonly used in agronomy, so it’s likely that you will have this available to help you take a more targeted approach to scouting.
4:06
NDVI stands for Normalized Difference Vegetation Index, and it’s a measure of the health and density of vegetation as detected by satellites.
4:15
So the green areas are the map on the map are meant to indicate dense healthy plants, and red areas on the map represent areas that are more sparse or have smaller plants, probably dealing with some more stress.
4:30
Is it always that simple though?
4:32
Not exactly.
4:33
The northeast corner and East edge of this field could look like the thickest vegetation to a satellite because maybe there’s an outbreak of weeds out there.
4:42
Maybe that’s where the giant ragweeds are breaking through, and then that would be a totally different problem.
4:49
So we need to get out and ground truth whatever we’re seeing in the satellite image.
4:56
But we can still target those red and green areas and get good coverage of the field to find out what’s causing the differences there.
5:05
When the red areas truly are the more stressed areas of the field, nutrient deficiency could be a reason why.
5:15
So what are we going to look for when we’re out in the field?
5:18
These are basic symptoms for many of the nutrient deficiencies that we’re going to talk about.
5:24
So I wanted to kind of go over their definition so you’re more familiar with them when we go through the nutrients.
5:31
Chlorosis is the yellowing of plant leaves like you would see on this soybean plant here.
5:40
Necrosis is dying tissue, so it’ll look brown, kind of dried out and crumbling like it’s going to fall through like in these areas of this plant.
5:52
And then stunting refers to a smaller plant with reduced growth and shorter stature.
5:59
You’ll hear the same symptoms used to describe a number of nutrient deficiencies, and the key difference between them is going to be where the symptoms are located on the plant.
6:13
So here’s a few words that I’ll use to help describe those locations.
6:18
A node is the part of a plant stem where the leaves are attached, so that would be a node right there.
6:26
This would also be a node and then an internode is the space between them.
6:33
Leaf margins are the outsides of the leaves.
6:36
And then the midrib or midvein is the central vein of the leaf or leaflet.
6:41
So typically I see broad leaves, we’ll call it a mid vein or yes, mid vein.
6:48
And in our grass species when that mid vein is more prominent and stands out, it’s a little stronger.
6:55
We call it a mid rib.
6:56
So, but they essentially mean the same thing.
7:03
Now I’m going to go over some of the key nutrients and potential deficiencies we could see here in Wisconsin, which are nitrogen, phosphorus, potassium, sulfur, zinc, manganese and boron.
7:17
So not all of the essential nutrients that I have listed here, but the ones that will probably be the most likely for you to see.
7:25
For each one, I’ll give you a description of their symptoms, tell you what soil or environmental conditions might favor deficiency of that nutrient, and I’ll have pictures at the bottom of each slide show an example of what deficiency typically looks like in corn, soybeans, wheat and alfalfa when they’re applicable.
7:58
So nitrogen is one of the most common nutrient deficiencies that you might find because it’s a challenge to manage.
8:05
Deficiency symptoms will start on older leaves, which are the ones lower on the plant.
8:12
It looks like general chlorosis or yellowing or a V shaped yellowing that extends from the tip of the leaf up the middle or the mid rib of the plant.
8:26
It can also cause stunted growth.
8:29
Nitrogen deficiency is most common in coarse sandy soils and under wet conditions because nitrogen can be leached out of the root zone.
8:39
You’ll see that I don’t have an alfalfa deficiencies photo and that’s because it’s really not that common.
8:45
Honestly.
8:46
It’s not super common in soybeans either, and that’s because both of those crops are legumes and we’ll talk about that too.
8:55
Legumes are able to form symbiotic relationships with the bacteria in the soil.
9:01
The plant provides a home and sugars for the bacteria and the bacteria fix nitrogen for the plant.
9:09
So there are times though when we want to make sure that relationship is working, especially if a field hasn’t been soybeans for a number of years and now it is and maybe we we needed to apply an inoculant on the soybean seed to make sure that we were going to have that bacterial population to form those relationships.
9:31
So to do that, we’re going to dig up some of the roots and take the nodules, which are these little bumps on the roots where the bacteria live, and slice them in half.
9:44
They’re pretty soft.
9:45
You can probably do this with your fingernail.
9:48
Functional nodules are pink or red in the middle.
9:52
So if you can find that, you’ll know that nitrogen deficiency is going to be unlikely in that field.
9:58
If this was not a functioning nodule, it might look kind of greenish, grayish, brownish, and extra mushy.
10:11
Phosphorus is another important nutrient for crops.
10:14
Deficiency will appear on older leaves first.
10:18
They may be dark green or purple in color, like you can see along the edge of these leaves here, and they could be weak and stunted plants.
10:29
This is most likely to happen in poorly drained soils, under cool soil temperatures, and in weathered soils.
10:36
Fortunately, a lot of our farms have a history of manure applications here in Wisconsin, and those manure applications are are pretty high in phosphorus, so those farms are unlikely to have this.
10:48
But if it’s a farm that hasn’t had animals in a number of years, probably more of a concern there.
10:59
Potassium is another one of the most common deficiencies that I’ve seen out in the field.
11:05
Symptoms first appear on the older leaves again as chlorosis or yellowing and necrosis or brown and dyeing tissue.
11:13
As the deficiency progresses.
11:16
So this will appear along the leaf margins or edges and in alfalfa, it’s going to look a little bit different.
11:23
It’s going to be a little bit more like little yellow or white spots around the leaf edges.
11:30
Crops also exhibit reduced growth and tend to have more problems with lodging or falling over when we have high wind events.
11:39
So this could happen in cold and wet soils or when drought limits the movement of potassium into plant roots.
11:54
Sulfur has become more and more commonly deficient during the last couple of decades due to clean air initiatives, which have been really great and reduce the amount of sulfur deposition happening from acid rain.
12:08
As shown in this comparison map from 2020 to 2022.
12:13
There’s been significant reductions, but as a result, farmers have needed to add sulfur into their soil fertility programs to make up the difference in what’s being provided through the atmosphere and what’s needed by their crops.
12:32
So unlike the deficiencies that we’ve talked about so far, sulfur deficiency symptoms affect the younger leaves, which are going to be higher up on the plant.
12:42
They will have general yellowing and plants will be stunted.
12:46
This happens most often in soils with low organic matter and sandy soils.
12:51
So a lot of the same conditions that you might see a nitrogen deficiency. These next three nutrients are considered micronutrients, which means plants don’t need them in as large of quantities as the previous nutrients that we’ve talked about.
13:12
So that’s a good thing.
13:14
In general, our soils are naturally naturally have a decent supply of these nutrients.
13:20
Zinc, manganese and boron are still the ones that we kind of want to watch out for as we continue to use our soils and and they become more depleted over time.
13:31
Zinc deficiency shows up on younger leaves as pale green, yellow or white striping between the leaf margin and the mid rib on corn and other grass crops will have similar symptoms.
13:45
Very streaky looking and it can cause stunting or shortened internodes on broadleaf crops, making a really bushy looking appearance.
13:57
This can occur in soils with low organic matter, muck soils and in cool, wet conditions.
14:06
Manganese deficiency will cause yellowing or chlorosis or a spotty appearance on newer leaves.
14:14
This may happen under high moisture or saturated conditions, or soils with too much or too little organic matter.
14:25
Boron deficiency affects the newer growth of the plant, also causing shortened internodes and results in a bushy appearance.
14:34
Again, young leaves may turn yellow with a reddish coloration, so it’s a little bit different in that way along the leaf margins or edges.
14:44
And this may happen when weather is dry, or in soils with little organic matter, coarse or sandy soils, or in heavy clays.
14:56
I know that’s a lot of things to remember and a lot of symptoms to try to keep straight, but the good thing about being a crop scout and agronomy professional is you get to use your resources most of the time.
15:09
Montana State University has this flow chart that I thought was a really nice way to sort out different potential nutrient deficiencies based on questions about the symptoms you’re seeing.
15:21
So there will be a link to their website in the chat if you’re using this.
15:26
You just kind of start at the top, go along and answer the different questions based on what symptoms you’re seeing and where they’re located on the plant.
15:36
Kind of like we talked about so, kind of a convenient tool there.
15:47
But sometimes we may see symptoms in the field that look like a nutrient deficiency, but they’re actually caused by something else.
15:56
This corn leaf has necrosis or dying leaf tissue along the leaf margins.
16:03
So in some cases, this could look like a progressed potassium deficiency at first, but it’s actually a nitrogen burn from a top dress fertilizer application.
16:14
If you could see the whole plant, you’d see the damage isn’t restricted to the lower leaves like like we would most likely see with potassium deficiency.
16:24
They’re affecting all of the leaves that were exposed at the time that that nutrient application took place.
16:36
This corn plant is purple, which is a very distinctive symptom of phosphorus deficiency.
16:44
But it can also occur when when days are bright and sunny and temperatures then drop below like 40 or 50° at night.
16:56
Cause during the day the corn plants are really, really happy.
16:59
They’re producing a bunch of sugar.
17:01
And then at night they kind of slow down and don’t really get to move it as well as they would want to.
17:06
So certain hybrids are genetically more likely to produce this purple coloration under those conditions and it’ll go away once nighttime temperatures get warmer more consistently.
17:22
These next plants are exhibiting chlorosis and they’re kind of the bleaching look.
17:28
To me, this kind of almost looks like the zinc deficiency or, or many others.
17:33
But these plants are actually the result of a herbicide damage.
17:38
So this could be something like a tank contamination, just the wrong mix or or maybe a carryover from the previous year’s chemicals still being in the soil.
17:51
So that’s another one that can be mixed up.
17:56
And then this is an alfalfa leaf with sclerosis extending from the leaf tip down the mid vein.
18:03
If this was a corn plant, it would look just like nitrogen deficiency.
18:08
But in alfalfa, this is actually a very characteristic symptom of what we call leaf hopper burn, which happens as a result of leaf hopper insects feeding on these plants.
18:21
So these are just some of the most common look alikes that you might come across.
18:24
And, and I think they’re really good examples of why it’s important to correctly diagnose a nutrient deficiency because there’s several things that could look like it out in the field.
18:37
But in in these situations, applying more fertilizer isn’t going to solve the problem.
18:43
It’s just going to cost the farmer more money.
18:51
One of the best ways to diagnose a suspected nutrient deficiency is to take a plant tissue sample and corresponding soil samples.
19:00
Hopefully, you were able to join us last week for the crop staging stand counts and soil and tissue sampling webinar to get the details on these processes.
19:11
If not, the recording will be available on our Foundational Crop Scouting Training website soon for you to get more information.
19:21
So let’s go back to our NDVI image from earlier.
19:25
Say we have scouted the field and verified that yes, the green areas are healthy robust plants and the red areas are experiencing stress and we have some visual nutrient deficiency symptoms.
19:39
We can take tissue samples and soil samples in each of these areas to compare with each other and kind of see what’s missing and how we can maybe fix it.
19:54
Some agronomists and farmers prefer to take a more proactive approach, and will take tissue samples before deficiency symptoms are actually visible.
20:04
This is because when by the time symptoms are available, there’s already yield loss happening in that crop.
20:12
At that point, it may only reach up to 75% of its yield potential.
20:18
So they’re looking for what we call the hidden hunger.
20:23
This is where nutrient supply is at a level where deficiency symptoms aren’t visible, but the crop is kind of coasting by on what it’s got available and it could still use more in order to reach its full potential.
20:40
So the process for this would look a little different since we don’t have visible symptoms to focus our sampling approach on.
20:50
Instead, we’re going to take a representative sample for each 20 acres of the field.
20:57
So let’s say this field is 40 acres.
20:59
I’m going to split that into two sections.
21:03
In this case, I’m going to pick the east and West because I’m anticipating that there may be some soil type differences between the West side being closest to the road and the east side that kind of slopes down to the field edge.
21:24
So taking a tissue sample and a soil sample together will tell us if the field is truly deficient in that nutrient.
21:31
Like in sample one here we can see that phosphorus and potassium are very low.
21:37
So there’ll be no surprise that there are deficiency symptoms there.
21:41
In some cases.
21:43
The soil’s fine actually in phosphorus and potassium and potassium and sample two, you can see that that they’re in the optimum range.
21:53
So in this case, they’re just not getting into the plant for some reason and we kind of need to figure out why.
22:03
One of the reasons that nutrients might be sufficient in the soil but deficient in the plant is potential interactions between nutrients, which the soil samples will hopefully give us a little bit of help in in giving us clues to that.
22:19
When some nutrients are unbalanced, they can inhibit the uptake of one another.
22:25
And pH is also a factor in affecting nutrient availability.
22:32
So each nutrient acts differently at different pHs
22:37
But if we can keep our pH somewhere between 6.5 and 6.8, somewhere in that range, that’s the optimum range for most of the crops.
22:49
We most of the main crops we grow here in Wisconsin anyway, the corn, soybeans, alfalfa, wheat, We’ll maximize the availability of most of the nutrients that we need.
23:02
So if you’re interested in learning more about nutrient interactions, we’ll have a link to our crop nutrients 101 overview in the chat.
23:12
And that’s got some really good, the good definitions and and specific interactions that play.
23:24
Sometimes it’s a matter of something else physically preventing nutrients from being taken up by the plant.
23:32
So while we’re in the field, we need to do some digging, pun intended to.
23:39
We’re going to see if we can rule out any of these other factors.
23:43
Anything that’s limiting roots from exploring the soil is limiting the plant from taking up nutrients.
23:50
So this first image is comparing normal root growth to roots that are suffering from sidewall compaction.
23:58
This could happen when soil is too wet at planting.
24:01
When you dig up this plant and gently remove soil away from the roots, you’ll notice that the roots look like a flat fan, very narrow.
24:11
They’re not spreading out and exploring as much of the soil as the unaffected plant here.
24:18
This means the roots are being restricted.
24:21
They might only be getting nutrients from that narrow band of soil that they’re able to reach.
24:28
Insect damage is another way that roots can be restricted, as you can see here.
24:34
Some insects like western corn rootworm feed on corn roots, which makes their root systems physically very very small and unable to reach many of the nutrients and water that the plants need.
24:48
So something like this would definitely be a very big problem.
25:00
Another step we can take to get a better diagnosis is to look for patterns in the field.
25:07
Straight lines like this first picture and this other one rarely occur in nature.
25:14
So if you see straight lines like that, it’s an indicator that whatever is causing this problem is probably human influenced.
25:24
So it might be something like a nozzle is plugged on the sprayer, or a skip, or an overlap in the fertilizer application.
25:34
Soil type variations also tell a story in these situations.
25:41
As we talked about earlier, certain soil types and conditions have have a significant influence on the likelihood of seeing nutrient deficiencies.
25:52
So you can see a few of those there.
25:53
This is an aerial like a drone image of the field showing that.
25:59
And then this is what you might actually see when you’re out in the field, like at the field level is some of that variation.
26:07
It it definitely really stands out when you’ve got drone images that you can look at too.
26:15
But if an entire field is affected almost equally, it could mean that the field was missed when spreading fertilizer or maybe it got the wrong mix and it’s missing something.
26:27
Crazier things have happened.
26:28
So just a lot of things to to keep in mind and be on the lookout for.
26:39
After you’ve done all that work in the field, it’s time to communicate what you found to the farmer or the agronomist that you’re working with.
26:48
Be as descriptive as possible.
26:51
It really, really helps to write things down while you’re in the field.
26:55
It’s easy to forget what you saw in each field after you’ve looked at a few in one day.
27:00
There will be a link to our field scouting report template in the chat for you to to use and have available to you.
27:08
It’s really helpful.
27:13
Let’s see.
27:15
Yeah.
27:15
You’ll want to write down what symptoms you saw.
27:18
Where were those symptoms located on the plant?
27:22
Where did you see symptoms in the field and how much of the field is affected?
27:26
Because that’ll that’ll make a difference too.
27:29
in what kind of action we take.
27:32
Was there anything else that might be playing a role in contributing to the problem?
27:36
So digging for the roots, looking for the compaction and the insect damage or, or what might have been herbicide.
27:46
Yeah, we don’t expect you to have all the answers, but we need you to be our eyes and paint the picture of what you saw out in the field so that we can make the correct diagnosis and make a plan for how we’re going to address it.
28:10
In summary, here are a few points that I want you to take to the field next time you’re out scouting.
28:16
Know what deficiency symptoms look like for our our key players, nitrogen, phosphorus, potassium, sulfur, zinc, manganese, and boron.
28:27
And if you see a problem, plan to take tissue samples and correlating soil samples to help confirm the suspected nutrient deficiency.
28:37
That the two of them together really give us a lot of great information.
28:43
Gather as much other information in the field as possible and be detailed when communicating your findings accurately diagnosing problems in the field is the best way to make sure we can take the right actions to manage it effectively.
29:00
So I know that was quick and it it might have been a little bit by design, not knowing how my voice was going to hold up for this.
29:08
So I’m going to open it up for questions.
29:11
Also, if you could please take a minute to complete our evaluation survey.
29:16
We really appreciate your feedback and on these lunch and learns and let us know what you like.
29:21
Let us know what we can do better.
29:23
We want to keep improving for you.
29:25
So do we have any questions?
29:37
I can get us started here?
29:38
Jordan, quick question for you.
29:41
Thanks for the talk.
29:42
I, I, I was curious how, how long you know, does it typically take for some of that herbicide damage to appear after spraying?
29:49
Is that something like that is just overnight or you know, just trying to think about when when we’re in the field trying to determine if that’s a nutrient deficiency symptom or or potentially a result of the misapplication?
30:02
Yeah, that’s a really good question.
30:04
So it kind of depends on the type of herbicide that it is and and which method of delivery we’re seeing it in the field.
30:12
So if it’s a herbicide carryover problem from a product that we applied last year, you’ll see those symptoms right away as as the crop is trying to germinate and starting to grow.
30:26
If it’s a tanks mix issue or contamination, you’ll see it fairly quickly after, after the product is sprayed over top of the plant.
30:38
Kind of depends a little bit on the weather, how fast the plants are growing.
30:42
So lately in the last couple of weeks, we’ve been really, really had some cool temperatures, cloudy days.
30:50
Plants have been growing a little bit more slowly.
30:53
So depending on the chemical, probably a little bit slower to show up.
30:58
They’ll show up the fastest when we’ve got really warm, sunny conditions and the plants are growing super fast.
31:06
I’d say with usually within a week you should be seeing those issues though.
31:11
Good question.
31:12
Thanks.
31:13
That was really helpful.
31:14
Looks like you have one in the chat too.
31:17
Awesome.
31:19
Any diseases that you’ve seen through the years that are easy to mistake for a nutrient deficiency?
31:27
Yeah, there’s sometimes.
31:32
Let’s see, sudden death syndrome and soybeans can look like nutrient deficiency ’cause that’s that’s one that affects the plant from the inside out.
31:43
So the disease infects in the stem and effects their vascular tissues and ends up kind of causing the same chlorosis that a potassium deficiency would look like.
31:57
So yellowing around the edges of it, but it’ll progress a lot faster and it’ll affect the upper growth first typically.
32:07
But yeah, there’s there’s several to be aware of and wants to look out for.
32:11
There’s also one in alfalfa that looks a lot like potassium deficiency.
32:15
I can’t remember what it’s called though.
32:17
I’ve never seen it out in the wild here though.
32:20
So hopefully not one that we have to worry about.
32:24
I see there’s another one in the chat.
32:26
Is it possible to tell nitrogen from potassium deficiencies?
32:30
Yeah.
32:32
So they’re both going to start affecting the plants on the lower leaves, but nitrogen deficiency is going to start at the end and kind of stay along the middle of the plant or the middle down the leaf.
32:47
So right along the mid vein, potassium deficiencies will stay have chlorosis along the outer edges and leave the inside portion green.
33:00
So that’s how I usually tell the difference.
33:04
They do look a lot alike as they’re when they get more more progressed.
33:11
And if it’s very deficient and it ends up, you know, some of those really lower leaves, like the very first ones that come out when it’s very deficient, you know, the entire leaf will turn yellow eventually.
33:24
And in those situations, you know, it’s really good to take a tissue sample.
33:28
So that’ll always be the the most definitive way to to make that difference between them.
33:38
But until then, be sure to join us for the rest of the series.
33:42
These lunch and learn webinars will continue each week until June 17th and then we’ll kick off our regional in person field days.
33:53
So we’ll, we’ll kind of get together at these different locations and, and put everything we learned in these webinars into practice and get some infield experience, which is going to be really great.
34:05
Registration is open on our Foundational Crop Scouting Training web page for that.
34:11
On behalf of the UW Madison Division and Extension Crops and Sows program, thanks for attending today.
34:17
We really hope to see you next week Wednesday to discuss basic insect identification.
34:23
Have a great week.
Foundational Crop Scouting Training
Providing crop scouts with the key foundational skills necessary for successfully scouting field crops including corn, soybeans and alfalfa.