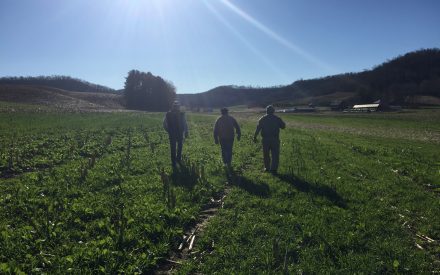
Video Summary
Dr. Brian Luck from UW-Madison’s Department of Biological Systems Engineering explores the cutting-edge technologies transforming on-farm research. This session, “Harnessing Technology for On-Farm Research,” covers the latest advancements in precision agriculture, including GPS systems, variable rate technology, and innovative software tools. Learn how to leverage these technologies to enhance your research projects, improve data accuracy, and make informed decisions that boost both productivity and sustainability.
Whether you’re a tech-savvy farmer or just starting to explore precision agriculture, this webinar offers practical insights into using GIS software, setting up prescription maps, and integrating various equipment for optimal research outcomes. Dr. Luck shares his expertise on minimizing variability, utilizing drones for data collection, and collaborating with trusted advisors to ensure successful research implementation.
Transcript
0:01
Good afternoon, everyone.
0:03
Thank you all for joining today for our second in the series of conducting effective on farm research.
0:10
As folks trickle in, I’m going to go over a few housekeeping items.
0:15
Today’s session is on harnessing technology for on farm research and really lucky to have Dr. Brian Luck here with us today.
0:22
He’s a professor and extension specialist at UW Madison’s Biological Systems Engineering.
0:29
All right, so Abby asked me to put together a technology list of things we can do for on farm research here.
0:38
So new presentation for me.
0:40
Excuse me if I look surprised at what the next slide is because again, it’s brand spanking new, but I’m excited to do it.
0:49
It’s, it’s an interesting topic that we do kind of approach in precision ag research quite a bit, but branching out, you know, beyond that into other areas is, is interesting to me.
1:03
So kind of what do we need to, to get started or what can we do?
1:08
So I guess I’ll, I’ll roll right into it.
1:11
I usually do these conversations in person where the audience can respond.
1:16
So forgive me if I feel a little lost when I can’t get a laugh or anything out of you guys, but looking at precision ag technology with an eye toward on farm research, where do we start?
1:28
And this is kind of where my brain goes is, is the software.
1:34
So in the precision ag world we have basically I’ll, I’ll do this verbally while I mute my phone because I forgot to do that, you know, sort of sort of three or four different systems that we’re working with.
1:48
So usually we have some sort of software on the farm or with our crop consultants that you know, can do various things and it’s usually a geographical information system software at its core.
2:04
So GIS, if you’ve ever heard that term before, it is what it is.
2:09
Depending on your level of interest and willingness to learn, you can.
2:16
You can do a lot of things with a free GIS software, something like QGIS.
2:22
The file formats and different, whatever you want to call it, needed information, metadata, etcetera are pretty well standardized across this across this world, for lack of a better term.
2:40
So when we talk about shapefiles, the shapefiles are probably the same in John Deere, whatever their things called Command Center, or Ag Leader SMS or anything else.
2:53
So one of the one of the really interesting things from a research perspective is, you know, we can set up prescription maps and as long as you sort of have the the format output needed or use something like Ag Leader SMS or some other ag type of software, you can send your prescriptions, your plot layouts to a machine.
3:19
And as long as that gets set up correctly when planting happens or fertilizer application or whatever else, we’ll talk about the different options here in a bit.
3:30
In theory, you don’t have to be there.
3:33
You could, you could broadcast a trial across the entire state and as long as you trusted your, your collaborators, your farmers, your operators, your co-ops, you can put together a really nice study on a broad landscape, which is really, really interesting.
3:50
So I have a picture there of of AG Leader SMS, which is the software that I’m used to.
3:57
The reason we tend to use that in academia and especially in UW Madison, the BSE department is it’s color blind.
4:06
So it will talk to John Deere, it will talk to Case IH, it’ll talk to AGCO products, it’ll, it’ll output the files in the way that they need to be output.
4:16
So the prescription maps work correctly in the everything else.
4:19
So it’s one of those that it’s really nice.
4:23
I looked on a, a couple Ag Leader training videos yesterday when I was finishing this thing up and, and they have a, believe it or not, a plot layout tool within the SMS.
4:36
Now it is tailored more for the ALMACO type planners where their GPS tripped in small plots with alleyways and blah, blah, blah, but really, really well thought out and will put out the format that those machines need to be able to put the plots out.
4:53
I put something in here too.
4:54
You can use some innovative thinking.
4:55
We’ve done that in in my lab before to, to basically make prescription maps that will put out bigger plots, so strip trials down the length of a field and and things along those lines.
5:08
So we can do quite a bit with this software and quite a bit from a distance is the way I like looking at it.
5:15
So I did do some Googling around last night and I’m sure Abby and others have have done the same.
5:23
There’s actually quite a bit of information and sort of extension type publications.
5:28
I just found this one from the Iowa Soybean Association on laying out plots and how to do it.
5:35
And today I don’t think I’m here to teach you statistics.
5:38
So I’m not going to go into a lot of depth about how to lay out plots and what the randomization needs to look like and things like that.
5:48
But at very least there are a lot of resources out there that if you want to do something like this, it it, it can be a big help.
5:55
So just just to give you an idea, I put that picture up there where we’re looking at a strip trial, whatever that could be.
6:04
And one of the things that you always have to consider and I think I have this in the label later slide, but I’ll bring it up now is the width of the equipment.
6:14
So we may be planting at throw a number out there 16-, 18-, 24- rows, who knows, wider, I hope not much wider than that.
6:25
But that you know, may exist where our combine only harvests 6 or 8 rows.
6:32
Or if you have a platform bean grain type head, you know, maybe looking at 30-, 40- feet, which is twice as wide as the planner.
6:40
So when you think about laying out strip trials and working with farmers to do this, you have to consider machinery widths, working widths of those machines to be able to match your plots up with the with the harvest width and make sure that your data comes out like you think it will, where you’re not straddling treatments and things along those lines.
7:02
So one of the things that I’m looking at here, you know, that that’s sort of interesting to me is, is basically a strip plot right next to one another.
7:14
So each strip is 1.
7:16
You know what looks like 1 ends on one row and begins on the next one.
7:22
Depending on space, that may be the way you have to do it, where your combine passes again, treatments and combine passes match up and it’s one of the next.
7:31
But if you have extra space and the farmer’s willing to do it, which is always another interesting conversation.
7:38
Sometimes when we’re talking about putting less seed out there, less nutrients or whatever we need to do, leaving a single combine pass between treatments kind of provides that what we call a buffer strip between our treatments and allows any anomalies to be sort of averaged out and and missed throughout that.
7:58
So just something to think about when you’re thinking about laying these things out in the field.
8:06
So what equipment can we use for on farm trials?
8:11
And I guess the, the short answer there is anything with variable rate technology.
8:16
So being able to, I listed a bunch here, planters, fertilizer applicator, sprayers, tillage.
8:24
But I, I think back to my experience working with spinner spreaders, those have variable rate application built into them.
8:33
So we can do that.
8:35
One of the things you got to consider those spinner spreaders usually spread in sort of a bell curve.
8:40
So the very outside of the spread width is a minimal amount of application in the center.
8:45
And what we do is overlap to match the centers and put out a certain application rate.
8:51
So paying attention to how you’re applying is a whole another thing to think about where’s if you have, you know, variable rates going down the field and you’re spreading center to center, you may have to spread too wide to be able to make sure that that center rate is what you think it is.
9:08
The other thing that I’ll bring up in this situation when we’re thinking about equipment is everything has momentum.
9:16
So I kind of getting into the physics side of it with you here a bit.
9:22
If you think about let’s say the the planter plate that is vacuum holding the seed to the side and getting ready to drop it.
9:33
And we want to go from a lower seeding rate where that planter plate is or the seed plate is spinning slowly to a higher seeding rate, which is spinning let’s say twice, three times as fast.
9:45
It’s not going to make that change instantaneously.
9:49
So that’s a whole other aspect a lot of people sort of forget about is when these machines are making these changes, there’s usually a gradient at the start of the change where you have to give the machine time to catch up and get to the planting or spreading or spraying speed and rate that we want to apply.
10:09
So it’s one of those, if you’re doing strip trials, you know, starting at the end of the field, your first call it 30-, 40-, 50-feet might be data that you don’t necessarily pay attention to due to the fact that that machine had to get moving.
10:25
If you have a change within the strip, there might be 30, 40-50, a hundred feet for that machine to make change from one rate to the next.
10:34
And being able to account for those or have enough length so that you can ignore those areas when you’re collecting your data is probably a good thing.
10:43
So one of the one of the good parts about this is that we’re setting this up on a machine, on a computer.
10:52
And so we can say, OK, the change is supposed to happen here.
10:56
And so a lot of machines have what’s called look ahead and we’re going to get into pretty deep into GPS here in a minute.
11:03
So I won’t dive into that just yet.
11:06
But basically the machine is looking ahead on the GPS or on the prescription map saying, I know a rate change is coming in the next X feet.
11:16
I need to start making that rate change now.
11:19
So they’ll actually start making the rate change before they arrive and then be in the middle as they arrive at your boundary and finish the rate change on the other side.
11:26
So you’ll have a, you know, an even change area basically across that boundary that you made the rate change in.
11:36
So anyway, just something to think about it, you know, don’t, don’t plan on the machines to be able to put the exact right rate out at the exact right time when you say do it because everything has momentum and take some energy to get the change to happen.
11:49
And some are faster than others.
11:50
Going up might be a little slower than making a rate change from high to low.
11:57
Planter plates are kind of a bad example because they have a pretty big electric motor on there that, you know, can can make that change pretty quickly.
12:03
But if you have a tub full of urea fertilizer that, you know, chain at the bottom of the tub is walking that stuff out to the spinner spreader, you know, it might take a minute for that chain to start moving a little more quickly just because of its size and how it’s being moved.
12:21
So couple of things I’ll, I’ll also bring up here when we’re looking at the different types, I put some question marks in there.
12:30
So planters, you know, seeding rates a, a fairly easy one to start thinking about when we’re talking about on farm research and, and doing studies.
12:38
Most planners have have variable seeding, you know, and it could be as much as individual row control.
12:48
So I can tell every row of the machine to put out a different seeding rate versus sections versus, you know, half of the planter versus the other half, etcetera.
12:59
If they’re electrically driven, usually you have individual row control on the machine and you can do that.
13:05
Fertilizer applicators, you know, if I was doing an on farm study and had the option, I would probably prefer a Gandy or that’s a brand name.
13:14
I know I shouldn’t say I’m not supporting Gandy by any stretch of the imagination, but basically an air applicator where we spread the material across out tubes and hit an impact plate and spread it that way as opposed to a spinner spreader.
13:29
Spinner spreaders are probably more efficient in the field, but those, those air spreaders you’re able to control across the width a lot of times in, in at least sections, right.
13:40
So the first three, first four “nozzles” or “air outlets”, “impact plates” can be a different rate than the next four, and the next 4 on down the line.
13:51
Sprayers are very similar when it comes to that.
13:54
So basically what we’re talking about is depending on how the sprayer set up, you can have all the way down to individual nozzle control, which can be as simple as just on/off.
14:05
So I can turn on and turn off nozzles, but if you get in some of the Capstan, Deere has it, you know, all of these see and spray things, they actually have a, a potential to actuate the valve by a pulse with modulation.
14:20
And I’m not going to go into how all that works and all that fun stuff.
14:23
But in the end, basically we’re fluttering the valve.
14:26
It’s, it’s an on/off valve, but we keep it open for a certain amount of time within a cycle and we keep it shut the rest of them out.
14:32
So 30% duty cycle say would be 30% and every second it’s open for a third, closed for 2/3, 33%.
14:42
Y’all are going to pick up me, I’m an engineer so I better get it right.
14:45
But Long story short, we can vary the rate applied as well with that technology.
14:51
So it’s one of those that not only do we, you know, are we able to on and off things, which is exciting enough as it is, we can also spray different rates out the out the out the nozzles.
15:05
I have a lot of background in sprayers, so I can’t help by talking about, I can’t help but talk about them quite a bit.
15:11
But the other thing that we are looking at there’s if you are varying the rate, you’re varying the rate of a mixed product, right?
15:18
So the, the water to product ratio is going to stay the same.
15:25
There are instances out there where we have what’s called direct injection.
15:29
So being able to pressurize the water back to the nozzles and then inject the chemical into the water stream as it goes back, it’s a whole different animal.
15:37
But you know, if it’s controllable by the precision ag and field computers, etcetera, then you can actually vary the rate of chemical contained within the water carrier and and do something totally different based on how much water is present.
15:50
So another interesting thing just to think about there. Tillage.
15:55
I, I don’t, I mean, we can, I think it exists already.
15:59
I’m pretty sure Case IH is working on this.
16:03
But basically it’s one of those that we’re looking at a variable depth or even potentially changing the tillage tool.
16:10
So we could have, you know, a front set of discs, a middle set of rippers, a rear set of discs and a finishing finishing tool and raise each and raise and lower each of those independently and apply different tillage treatments throughout the field.
16:23
And then finally drones.
16:24
I’ll, I’ll talk a little more about those later, kind of in the abstract as far as data collection goes.
16:31
But if we’re talking about sprayer slash spreader drones, again, they they can vary the rate as they go along.
16:38
One of the things that they are not capable of doing where ground sprayer is is varying the rate across the width of the area that they spread.
16:45
So just something to keep in mind that, you know, if you’re spraying or spreading with a drone, it can be varied, you know, kind of longitudinally down the plot, you can go up and down with your rate, but within the width you can’t, where a sprayer may be able to do that if that’s something you’re looking into.
17:01
So there’s probably others that I haven’t thought about.
17:05
And this is where we would have some audience interaction, I guess, if we were in person, but I’ll leave it at that for now.
17:14
I’m, if I come up with anything brilliant while I’m talking, I’ll, I’ll bring it up.
17:20
So at the core of the technology that we’re doing with on farm research is, is GPS here.
17:28
So I thought I would spend a little time just from a engineer’s perspective and make y’all, since I have a captive audience, make y’all listen to me a little bit on how GPS works because I think it’s ingenious and and pretty interesting.
17:47
So essentially we’re, we’re looking at a full system there.
17:51
And I borrowed that from my, from my colleagues at the University of Kentucky.
17:55
Surprise, surprise, but this was sort of developed when I was an undergrad and still holds true today.
18:01
So basically we have multiple satellites in the, in the sky, you know, in a usually in a geosynchronous orbit, which means that they’re moving fast enough that they’re the spot that they’re at relative to the ground is the same.
18:18
Not always.
18:19
Sometimes they, they move through the sky as well.
18:21
And we, we get them for parts of the day and don’t get them from others.
18:24
But most of the time the geosynchronous.
18:27
So basically when we look up at the sky, we have this option for GPS satellites that we can connect to.
18:34
We usually have a roving receiver on the machine that we’re operating when we’re talking about precision ag.
18:40
I’ll also get into some some discussion here in a minute about, you know, how do I, how do I mark my plots and record those data, you know, corners or lines or delineate the plots as well so we can get into the survey side of things also.
18:58
But usually we have a roving receiver and then we have the satellite sending a signal to the rover.
19:08
We’ll get into DGPS here in a minute.
19:10
I think I have another one another side for that.
19:13
So I’ll leave it alone for a second, but sort of the way that this works and then you know, that I think is really interesting is basically the satellites have atomic clocks and all you really know need to know about an atomic clock is it is about the most accurate way we can measure or keep track of time that we have today and probably will ever have if I was betting.
19:36
So basically we have a really accurate time stamp more or less.
19:41
And so each GPS satellite, basically what they, what they send out is a radio signal at the exact time that that signal left the GPS satellite, it’s time stamped and marked and sent out down to the whatever millisecond, let’s call it.
20:01
And so the roving receiver, the antenna of the things in our phones, everything else, they have junk clocks in them because we all couldn’t afford a phone with a.
20:14
Atomic clock in and I’m 100% sure of that.
20:18
But they are able to receive the message from the satellite and look at their own time that they’re keeping track of and say, OK, it left the satellite at time X and it arrived at time Y.
20:34
And I can basically tell you at that point, based on what I know about that radio frequency, how long it took to get to me.
20:41
And if I say that, then I can tell you how far away I am from that satellite.
20:46
OK, so that’s a really, really powerful tool.
20:51
And so I had that here kind of listed out.
20:55
Took 5 minutes to explain it where I wrote it in one sentence.
20:58
But again, I’m a nerd and I think this is cool.
21:01
So the the if you want to be really fancy and and get your friends confused, the technical term is trilateration is how GPS find your location on a 2D or 3D when we’re talking about an elevation included surface.
21:17
OK, if you have 3 satellites, you would be required to have an atomic clock on the receiver.
21:24
If we had three satellites only, it takes 4 to eliminate the need for that and be able to calculate the clock error based on the 4th satellite signal to give you a 2D representation of where you’re at X&Y.
21:38
So Lat and Long in this case.
21:41
And then basically we add more receivers than that, more satellite connections I should say, and we can get elevation as well.
21:50
So basically the long and the short of that conversation is the more satellites we can see with our GPS receiver, the better off we are as far as figuring out the accuracy of where we’re at.
22:05
Then we get into differential correction, which is a whole other ball of wax I should say.
22:13
The vast majority of our GPS signals these days are, are differentially corrected.
22:19
It just depends on how close you are to your stationary receiver as to how much it costs usually and the accuracy that you’re getting out of your GPS.
22:33
So if we go for, I think it’s on the next slide, let me check.
22:39
Nope, it’s on that slide.
22:41
So let’s stay here for a minute.
22:43
Basically what we’re talking about here is I have a roving receiver out in in the world somewhere and then I’m also able to receive some kind of signal either from a satellite, you know, kind of one that’s bounced off a satellite or Direct Line of sight radio transmission, cellular, whatever it is from a stationary receiver.
23:06
And so if I have that stationary receiver, you can assume that our friends in the surveying business surveyed that in to a very precise known location.
23:17
So we have a a stationary receiver that we know exactly where on earth it is with the exact elevation and the exact everything.
23:27
What it does is connect to the same, same or similar satellites that you’re connecting to and calculates its position and it says, OK, I know I’m here, but I am being told by my GPS satellites that I am 3 feet one direction: up, down, lat, long, left, right, whatever.
23:49
That’s the differential correction.
23:51
So it can essentially correct that signal and say it’s telling me I’m 3 feet, but I know I’m here.
23:58
So everything that my roving receiver receives should be calculated back to three feet, whichever direction it is off.
24:06
OK, our phones, your garmin in your car, your car GPS, everything else is usually wide area augmentation system corrected.
24:16
So WAAS corrected.
24:18
Same thing that airplane airplanes run on.
24:20
If that makes you feel a whole lot better.
24:22
I don’t really think it probably should, but well that’s what it is.
24:26
Is there.
24:27
It’s built for aircraft.
24:28
So there’s quite a few WAAS stationary receivers across the country.
24:36
They’re pretty few and far between. For airplanes up there in the middle of nowhere, you know ±10-15 feet doesn’t matter.
24:46
On the ground,
24:46
when we’re doing plot research, controlling, you know, agricultural machines, it probably does.
24:53
Driving down the road doesn’t really matter because they’re under the assumption that the human is going to probably keep it between the ditches.
25:00
So if it says I’m over in the other lane, you’re still in the general vicinity and going in the right direction.
25:08
There are other correction signals that get you ±6 centimeters, you know, all the way narrowing down to the exact.
25:17
The best thing we have today is RTK, which is real time kinematic corrections.
25:23
And I’ll get into what that is in a couple of slides here looks like.
25:27
So the the next thing we’ll talk about is sources of error.
25:31
And I stole this straight off of Garmin’s website.
25:33
All credit to them and I’ll, I’ll let you skim through this.
25:38
There’s a couple that are, you know, there’s only a couple that we have any, any remote control, any control over it can be able to change.
25:49
And I think those two are what’s called the signal multipath error, which is essentially it’s easiest to explain like when you’re in a city.
25:58
So I don’t know if you’ve ever tried to use your GPS driving through downtown Madison or Chicago or you know, pick your poison there, Milwaukee, whatever, and you’re in between these big tall buildings.
26:10
Well, you can see out enough to get a GPS signal, but what’s actually happening is the signals coming down and it’s not coming straight to your receiver.
26:20
It’s actually bouncing off two or three buildings before it gets to you.
26:25
If that happens, then that affects the amount of time that it took for that signal to travel.
26:31
And if you’ve ever been in the city and looked at your GPS and see your car in the middle of a building as it’s displayed, that’s exactly what’s happening.
26:40
It’s multi path error.
26:41
So basically it’s not taking a direct line to the receiver and the calculations off.
26:48
The other thing that we can sort of control ish is the number of satellites visible.
26:55
And so we say that sort of control ish.
26:58
So basically we’re looking at, you know, if you’re in the city and the buildings between you and five or six satellites, you won’t be able to accurately determine your location.
27:11
Same thing happens on the farm.
27:13
So if we’re up next to on the north side of a tree line and a big hill south of us, you know the, the chances of our GPS accuracy being really good or relatively slim in those situations.
27:27
Because we’re looking at the southern, usually the southern skies where the, the GPS receivers are, I’m sorry, the GPS satellites are, are in their GL secretness orbit.
27:40
And so as we have obstacles between us and them, that’s where we have a little trouble getting accurate GPS and we get some error built into our signals.
27:48
So I think the next, next slide what we’ll have is sort of GPS equipment and and sort of talking about our correction signals again.
28:00
So our phone like I said running on WAAS usually which is you know my nearest, nearest WAAS stationary receiver is probably 200 to 500 miles away from me.
28:15
Who knows, it could be between that so our, our WAAS pucks and the little Garmin pucks you put on stuff inexpensive and, and not altogether unuseful.
28:28
But one of the problems we run into is when we’re talking about the differential correction and all that fun stuff, it’s it’s the accuracy at the time.
28:40
It is usually pretty good, but with that more distance between us and the stationary receiver, the geosynchronous satellites, all the stuff ionosphere, all those error sources I told you about, essentially that sort of changes over time.
29:00
So let’s say in the spring, I go out, I lay out all these plots with a WAAS enabled receiver and I say here, here, here, put my flags in and then I come back in the fall.
29:11
So a good two, 2 1/2, three months have passed and I would take my receiver on my phone out and I walk back and I’m supposed to be right here.
29:20
And turns out it’s, you know, 5 rows that 12 rows.
29:24
That way we have what’s called drift with a lower accuracy GPS system.
29:32
And, and so if it doesn’t matter, you know, if you’re not using that for guidance and you’re just trying to find your points, it’ll get you within, who knows, probably 12 to 20 feet of where you’re supposed to be and you have to hunt around for it a little bit, fine, that’s not a problem.
29:49
But if we’re trying to control our planner and shut things off right at the waterway and turn it back on in the other side and, you know, make the changes at specific lines in the field, you know, we want something a little better than that.
30:01
So looking at the the RTK is another thing that that a lot of farmers are starting to use and, and be able to control with that less one inch or less accuracy is basically what you’re talking about.
30:16
Something interesting I did find that makes me kind of excited and I’ll show you a little bit more about it later.
30:22
But if you are able to add an external GPS receiver to your phone that is capable of working with an RTK correction signal, you can put a, there’s a free app on your phone where you can use it as a data logger and you can start surveying with a little receiver and your phone as opposed to buying the survey grade equipment, which is, you know, 10 upwards of $10,000.
30:50
So that’s a another thing that Dr. Luck may be trying here shortly to see if I can, you know, get RTK accuracy and control by using my phone, which is a you know, seems like really fun to me.
31:05
The other thing I wanted to mention for us here in Wisconsin and especially those of us that work for work for the state or government agencies, etcetera, is we have a WISCORS network.
31:19
And basically what that is, is it’s operated by our Wisconsin Department of Transportation and it has several stationary RTK base stations across the state that we’re able to tap into and be able to get our correction signal from those.
31:41
One of the things about real time kinematic or RTK GPS is if you don’t have something that’s stationary, some sort of subscription that you apply for and and pay for when every time you want to use it, you have to set out a base station, which is just another receiver that we leave stationary with a radio attached to it.
32:01
It’s it’s relatively simple, but that base station should be sort of surveyed into a known location, excuse me, or could be set over a benchmark that we have from previous uses.
32:19
Where is, if we’re using something subscription wise, then we just use that correction signal that we’re getting that’s, you know, 25-30 miles away and we’re still able to get the one inch or less accuracy that we’re looking for.
32:33
So it’s one of those things that it’s something that the state like has in place and, and provides.
32:40
I’m not sure on pricing.
32:42
Like I said, at the university, I’m able to have an account for a good buddy price of free where’s if you’re a crop consultant or something else out there, you know, you may have to pay a bit and look into that, but you can subscribe to it there.
32:57
I don’t think there’s really any limit of anything that’s a, it’s a broadcast signal that you can, that you can get into and, and provide your RTK corrections.
33:06
So something really, really interesting and you know, as far as I can tell, as good or better than any other correction signal that I’ve connected to with some of my equipment.
33:18
So something to consider moving forward.
33:24
I had a feeling that everybody was going to ask me about this, so I just went ahead and put it in there.
33:31
Much less than it used to.
33:32
How much does it cost?
33:35
So one of my favorite websites.
33:37
I’m a bit of an electronics nerd, but they kind of sell a prepackaged, whatever you want to call it, survey grade puck here.
33:47
And you know, they’re a little bigger than what we’re used to seeing as far puck, you know, 8-10 inches in diameter, 6 to 8 inches maybe.
33:55
But in theory is you, you can buy it for $1500 and put it on top of a straight stick that you’re able to make sure it’s level and then you’re able to essentially use your phone connect.
34:10
So basically, I guess put this on a straight stick is what I was saying.
34:13
And then you can use your phone to be able to collect the data points.
34:18
So we’re thinking about on farm research, if I do all this layout in in AG leader SMS and then I have the farmer to plant it, probably at some point I’m going to want to go out there and flag, you know, here’s the start of plot one, this row all the way down through there.
34:32
And so we’re under the assumption that the GIS system is in the right coordinate system and, you know, not putting us somewhere in the middle of Africa or whatever, which we’ve had that happen before too.
34:44
But Long story short, I know it’s, you know, in this lat long location, I can take this little receiver, I can take my phone and just walk to that exact lat long location, which should be seed number one on row number whatever across the field.
35:00
So again, there may be a little more work to this than I’m saying, you know, as far as getting everything connected.
35:07
But in theory, from what I was reading is you basically take this, connect to it by Bluetooth with your phone to get its data down and then you connect to the WISCOR’s network or something else on a cellular network and download that correction signal.
35:25
And then it puts your locator on the map exactly where you’re supposed to be.
35:28
So again, it’s, it’s one of those things that as you as you age, I’m realizing I’m getting a little older as I move on here that used to we talked about RTK GPS with this reverence.
35:41
And you know, if you’ve got 20 grand to spend on a surveying system, boy, that was something special.
35:47
And now again, 20 years later, here we’re looking at an RTK, you know, L band receiver for $1500 and you can do it with your phone, which is just absolutely fantastic in my mind.
36:01
So pretty excited about that.
36:05
Now I’ve clicked on Zoom and I need to get back here.
36:09
So little GPS summary here.
36:11
And then I think I got a couple of more slides and I told Abby I would be with between 40 and 45 minutes today.
36:17
So doing pretty good. RTK level accuracy is the best.
36:22
Just if if you’re looking to do something within our on farm research, I would say making certain that your producers have some kind of correction that they’re using.
36:34
It may not have to be RTK, but at least something better than wide area augmentation system.
36:40
Generally the way to ask that is are you paying for a correction signal?
36:44
And if they say no, then they’re probably, you know, on the WAAS network versus, you know, utilizing some kind of RTK or better, you know, correction.
36:55
Like I said, it can be done with lower accuracy, but don’t trust you know your GPS points when you come back months or whatever they even as little as weeks later.
37:08
And then like I said, if depending on pricing and everything else, I’m not sure how much it cost to join WISCORS, but if you are able to do that, you know, it looks like that you can do RTK on your phone or on, you know, on your person at very least, not necessarily controlling a machine, but on your person for less than $2000, which is pretty impressive to me considering where we came from.
37:32
So hopefully that’s enough to make you think about GPS and, and when you’re driving down the road next time.
37:41
So that’s my plan anyway.
37:46
So yeah, I lied, Abby, I’m going to be really, really over time here.
37:50
So we’re going to talk about measuring our plots now and utilizing yield monitors.
37:58
So there’s, you know, we put a lot of plots out there.
38:00
We’re doing our in season collection.
38:02
I’ll leave that to my agronomy, soil science, horticulture, etcetera, folks, you know, you know, you know what data you need to collect and then in the end we probably want to grab yield.
38:13
So I’ll hustle through a little bit of this, but one of the things is combines have yield monitors and have since the early 90s, I believe.
38:22
And So what, what, what does that mean and how does that work?
38:26
So moisture, we need to measure the moisture of the crop.
38:29
We need to measure the mass flow rate.
38:30
We’re going to measure our location with GPS and then we’re going to finally store that data somewhere that we can get access to it in the future.
38:39
Borrowed this straight off the Ag Leader website.
38:41
The the link is down there at the bottom.
38:44
But just to give you an idea how GPS receiver works.
38:46
So not really zoomed out on the combine.
38:49
So I’ll walk you through it really quickly.
38:51
Basically the first picture on the left there is looking at a moisture sensor.
38:57
So somewhere in the crop flow after all the cleaning is done, so on the clean grain side of the combine, grain will fall into some little contraption that is able to measure the moisture.
39:09
There’s capacitive sensors.
39:11
There’s a lot of other things out there that that are doing that.
39:13
Long story short, it does need to be calibrated and and compared to a known good moisture tester, but other than that it’s pretty much a single point calibration.
39:24
You type in the offset and off it goes.
39:28
The second part of the GPS or I’m sorry, yield monitor is our impact plate.
39:34
So the vast majority of yield monitors work off of impact plates and the engineering principle behind it is deflection and properties and materials.
39:43
So we build this plate and arm out of let’s say, I think it’s Teflon on the outside, steel on the back, and then the arms made out of aluminum, OK.
39:54
If I hit that that plate with a known force, then I know how much that or the the amount of deflection in that aluminum is proportional to the amount of force that hits it.
40:06
OK.
40:07
So what usually happens in combine is we have what’s called a clean grain elevator, which is kind of the picture you’re seeing there.
40:14
And basically it’s a bunch of.
40:16
Usually buckets or something along those lines on a belt and it collects from the bottom of the machine, the clean grain picks it up in a bucket, raises it to the top, throws it against the impact plate.
40:28
There’s our yield measurement and it falls down into the loading auger for our grain tank.
40:34
And so we’re doing this as every bucket comes by, we’re getting a reading on how much force is hitting that plate, which correlates directly to the amount of yield.
40:45
And then as the material through the machine changes, basically we wind up, you know, getting higher, lower impacts and that’s where we’re measuring our yield.
40:56
Couple that with a GPS receiver.
40:58
Now I know where in the field that happened.
41:00
And so I can measure my yield across the board.
41:04
There’s a lot of technology, fancy programming in there about look aheads and a lot of other things that I won’t get into today.
41:11
But just essentially know that they’re there where they try to say, OK, it takes X amount of time for that plant to get cut by the header and then to end up in the clean grain elevator.
41:22
And so based on that time, I shift all of my data points back to where I harvested that grain.
41:29
As far as the yield data goes, OK, I already covered the moisture sensor, so I won’t spend too much time here other than the fact that it needs to be cleaned on occasion.
41:40
And I say regularly here, I would say I don’t think you need to dive in there daily, but maybe weekly, something like that.
41:46
If you have a farmer collecting on farm research data and you want good yield data, that sensor needs to be cleaned.
41:54
We talked about this impact plate quite a bit, so I won’t spend too much more time on it.
41:59
But what I will say is there are other things out there.
42:02
There’s radiation sensors that exist, photoelectric sensors, paddle wheels, and one company who shall not be named is actually weighing the grain tank as we go along.
42:16
So not only are they using the impact plate, but they have filtering capabilities to filter the noise of the machine and weigh the grain tank as the grain comes in as a verification for yield.
42:26
So another, another type of sensor basically that we’re looking at there.
42:34
I did put out a publication and went to the learning store and grabbed this last night again before any potential learning store going away happens.
42:43
But it’s A4146.
42:46
The, the, the hard part for me is that every kind of yield monitor calibration process is different.
42:54
So I really can’t say exactly how in the world to calibrate with your yield monitor because everyone’s a little bit different, but I can’t give you some general, general ideas here.
43:04
And that’s, that’s what we’re going to do.
43:06
So when should I calibrate after inactivity, switching between crop types, changes in moisture, test weight of our grain changes and then changes is crop conditions should be accounted for and recalibrate.
43:22
The funny part when we’re talking to farmers about this, which I don’t know if any are in the room here, but they all kind of roll their eyes at me because the data may not be valuable enough to stop the combine and calibrate.
43:35
But I think we will get there soon.
43:38
I tell you this because it’s probably, if you’re going to harvest a field with your research plots in it, I think I would suggest or request that that combine be calibrated at least at the start of the field so that we have a a pretty good idea.
43:54
And calibration really just consists of harvesting a known area of crop.
44:00
And then the machine will say there’s this much grain by weight, you go empty that grain into a weigh wagon and weigh that grain and put your correction back into the machine.
44:12
OK, so again, each calibration run should be at least 3000, but 5000 lbs harvested is preferred.
44:24
The minimum number of loads recommended by the yield monitor manufacturer.
44:28
So basically, how many times should you do it?
44:31
Some recommend a single point calibration.
44:34
We run out there, we harvest 5000 lbs or what the yield monitor said is 5000, put it back in there and off we go.
44:41
Not the best I will promise you, not the best.
44:45
The other thing is the lowest should be taken as a single passes rather than stopping unloading, going some more unloading etcetera.
44:54
You just want to collect it all at once is the best way to do it.
44:58
The other thing a lot of people don’t think about is we don’t want to load the machine 100% when we’re calibrating our yield monitor as we see variation in the field.
45:09
And if you have an amount of variation expected, even better.
45:12
What we should do is vary the load on the machine and the amount of grain hitting that impact plate so that we can adjust for our different, different situations that we might see in the field.
45:24
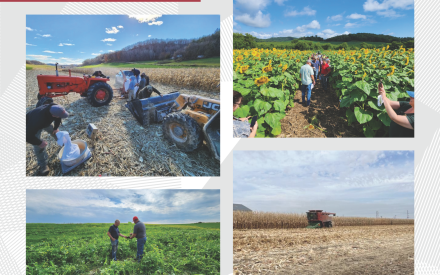
So I have an instance that we’re going to be doing this year where I’m putting out long, long plots in a production field with variable nitrogen rates out there to induce yield changes across that field.
45:37
So corn, you know, that may have 100 lbs of N, 0, 100, 150, 200, and 250 all randomized across the field, which I will get a drone picture of that because it’s going to be really interesting.
45:51
Look, I need to be able to calibrate that yield monitor on crop that is not part of my plots and reduce the flow rate to that, whatever that zero rate wound up being, which could be relatively low to 0 grain, you know, kind of thing.
46:06
So you want to do that.
46:12
And this is, this is what I’m talking about, changing that flow rate.
46:15
So got a two ways to do it.
46:17
And I think I have a picture here next.
46:18
So rather than bore you with text, I’ll get the picture out here.
46:22
But the way you can do it is you essentially slow the combine down and harvest for a pass.
46:28
So you’re you’re bringing in less crop as you’re moving forward.
46:32
You get 5000 lbs at 1, 2, and 3 speeds.
46:36
Then you have higher material flows as you speed up.
46:39
The other way you can go about it is harvest less of the header width.
46:42
So if you want to still go fast you take a third, 2/3, and a full header width at the same speed.
46:49
Then that will vary the flow through the machine and get your calibration correct for your yield monitor and make sure you have the ability to detect changes across that variation within the crop.
47:03
Long story short, calibrate it if you can.
47:07
Make friends with somebody with a weigh wagon if you don’t have one.
47:11
And, and I would calibrate more often than not if it were me, but especially if we’re talking about on farm research and harvesting plots, strip trials, etcetera that we put out there.
47:20
We want to make sure that combine has been calibrated recently and and is working in the region that we know it’s going to see within our plots.
47:29
OK.
47:33
One other thing I wanted to talk about quickly, and I think I touched on it a little bit, but there’s a new study out from The Ohio State University and one of my buddies, John Fulton over there where they compared combine yield monitor, various combine yield monitors, actually several of them to a plot combine which is weighing continuous grain flow through the machine.
47:56
And basically what what was said was, is that it any treatment variation as far as plot goes, you need to have, to be safe
48:06
And I say to be safe because you can do less than this, but to make sure that your combine is accommodating that you need to have your plot length about 350 feet or more to make sure that the, the impact plate in the combine is, is reading correctly.
48:23
So just something to think about.
48:25
And again, plan for header width when placing the plots as well.
48:28
I mentioned that earlier, but that’s what we’ll be doing in, in our study this fall.
48:33
Just based on the findings of this paper, I think of the the lower end, some of the some of the yield monitors were closer to 100 feet that they could accurately measure.
48:50
But I I didn’t read the paper well enough to know which one that was.
48:53
And they may not have even called them out.
48:54
It may have been yield monitor 1234.
48:57
They probably did it that way, but basically the worst case scenario was 350 feet.
49:02
So I know if I have 350 feet, any yield monitor that I’m using will be able to accurately estimate my yield.
49:11
I think this is my last slide and I’m doing pretty good on time.
49:15
So I’ll I’ll wrap it up here with just saying there’s data sources about your plots.
49:20
What else is there. Ton you can get at from free satellite imagery, drones.
49:28
We’ve talked about if you’re using that for a, a vegetative index or even just photos is not a bad way to do it.
49:38
There’s weather data and, and there’s in-field sensors and, and this could be any number of things.
49:43
So I don’t want to get too into the weeds for, excuse the pun with this.
49:51
But on the other hand, some things to consider is if you have a drone, everybody’s probably heard me preach, get your pilot’s license.
49:59
It’s not that difficult.
50:01
Then I’ll, I’ll leave it at that.
50:02
That tells you where you can and can’t fly or let you know where you can and can’t fly.
50:06
There are some we’re talking about stitching images together.
50:11
If you’re trying to do it yourself, it it’s a headache.
50:14
We did it in our lab.
50:15
We’re using MATLAB and some other crazy engineering tools to get, you know, each picture kind of stitched together and then pull out the area of interest that were as far as our vegetative indices.
50:25
There are canned solutions out there that are really nice and Terra thinks one DJI just came out with one with a multi spectral sensor on it.
50:34
Several others that basically you go do your flight plan, take your pictures and bam it puts you gives you an image back.
50:41
That data is generally in the GIS world called raster data.
50:44
So it’s a picture.
50:47
If you are able to use your GPS and get it georeferenced properly, you can bring that into software like AG Leader SMS or QGIS or whatever geographic information system you want to use.
51:01
When you do that, then you can start overlaying over your plots.
51:04
Find your plot boundary, pull out areas of interest, average numbers, blah blah blah, collect data, yadda yadda yadda.
51:11
Similar with weather data.
51:13
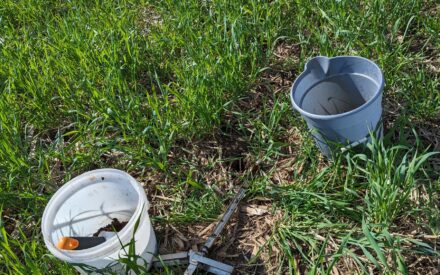
The in-field sensor thing I have some experience with just measuring soil moisture and soil temperature.
51:18
You put a little data logger out there, bury the sensors and off you go.
51:23
It it continuously logs.
51:24
That’s a really good way to sort of keep track of generalities around your field.
51:29
If you have a high spot, low spot, any variations in topography, you’re able to measure sort of what’s going on with those different areas.
51:38
I do like to mention that I usually put a metal post in a lot of survey flagging, colorful survey flagging out there where those sensors are.
51:48
Because if I’m running a combine through later, you won’t get it back because I basically the information I wanted to give you.
51:55
So using your RTK, new RTK GPS, you know, and walking out there and collecting those before, before harvest time is a really good idea if you want to keep up with them.
52:07
With that, I think I am finished and allowed maybe for 6 minutes of questions.
52:11
So proud of myself on a brand new presentation.
52:14
I’m doing good here.
52:15
What are we?
52:16
What do we have questions about?
52:21
Thank you, Brian.
52:22
That was excellent.