Cut-and-Carry Mulch Case Studies
Case Study 1: Food Farm
Wrenshall, MN
Managing Winter Rye Mulch Systems
End-of-Season Winter Rye Mulch Management
Winter Rye Mulch Production and Application Rates
Case Study 2: Scotch Hill Farm
Brodhead, WI
Choosing Switchgrass Mulch Systems
Managing Switchgrass Mulch Systems
Application Rates for & Transplanting into Switchgrass Mulch
Introduction
Mulching is one of the simplest ways to increase soil organic matter, retain moisture, and suppress weeds in an agricultural system. Many materials can be used for mulch, including both organic matter and synthetic materials such as plastic or landscape fabric. While plastic mulch is easy to apply, it creates waste and requires extra labor for removal. Organic mulches offer a more sustainable alternative, but sourcing enough plant material, chopped to a workable size, can be a challenge. Some farmers solve this by growing their own mulch crops, harvesting them, and then transporting the material to where it’s needed—a method known as cut-and-carry mulching. Scaling up this process, however, often requires the right tools and techniques.
A recent SARE grant helped to establish a community of practice of organic vegetable farmers focused on reduced tillage methods. A topic of interest among the group was the need for more information about effective mechanization strategies for cut-and-carry mulching. Here, we share a few stories from participating farmers.
Case Study #1: Food Farm, Wrenshall, MN (Janaki Fisher-Merritt)
Janaki and his wife Annie Dugan operate The Food Farm in Wrenshall, MN, about 30 minutes south of Duluth. The Food Farm produces certified organic fruits and vegetables on 18 acres with another 20 acres in the rotation that is cover cropped (Figure 1). The Food Farm also raises laying hens.
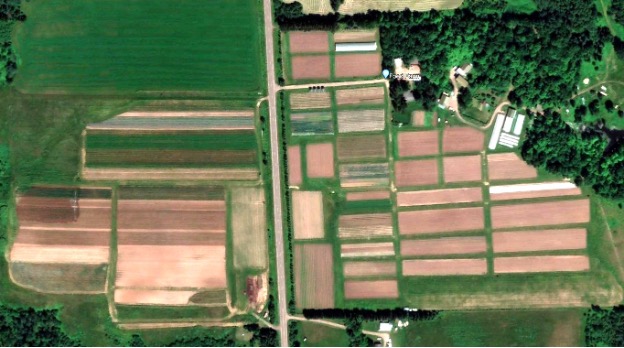
Figure 1. An aerial view of Food Farm showing the 40 acre farmstead on the right side of the road containing most of the cropland. To the left of the road is newer land that Janaki and his family purchased in 2014.
Janaki and Annie’s passion is growing high quality food for their CSA members, providing a sustainable livelihood for their employees, and improving the productive capacity of their land. Their soil is not very well drained, so increasing soil organic matter is a priority—one they address in part by reducing the amount of tillage on their farm as much as possible.
“The better we can treat the soil, the healthier it is, the better crops do, the more resilient they are. Whatever I can do to reduce tillage operations—especially when it’s too wet or too cold here, that’s a good thing. It makes our lives easier,” Janaki said.
Managing a Winter Rye Cut-and-Carry Mulch System
Janaki is working to optimize a winter rye cut-and-carry mulch system for some crops, such as tomatoes, which has the added benefit of reducing the amount of labor needed for weeding.
About three weeks after transplanting the tomatoes—usually around the end of June, when the winter rye is flowering and well before seeds begin to mature—Janaki mows the rye with a flail mower (Figure 2). Unless the rye is only 3-4 feet tall, he mows the rye twice to chop the stalks into shorter pieces, which are easier to spread and less likely to get tangled around the equipment during deployment.
In the first pass, he opens the back of the flail mower and drops the rye onto the ground (video). In the second pass, he closes the back of the flail mower and uses a pick-up head that lifts the rye—also called greenchop—into a chopper box, which is a wagon fitted with rotating beaters used to haul and unload silage or haylage (Figure 3).
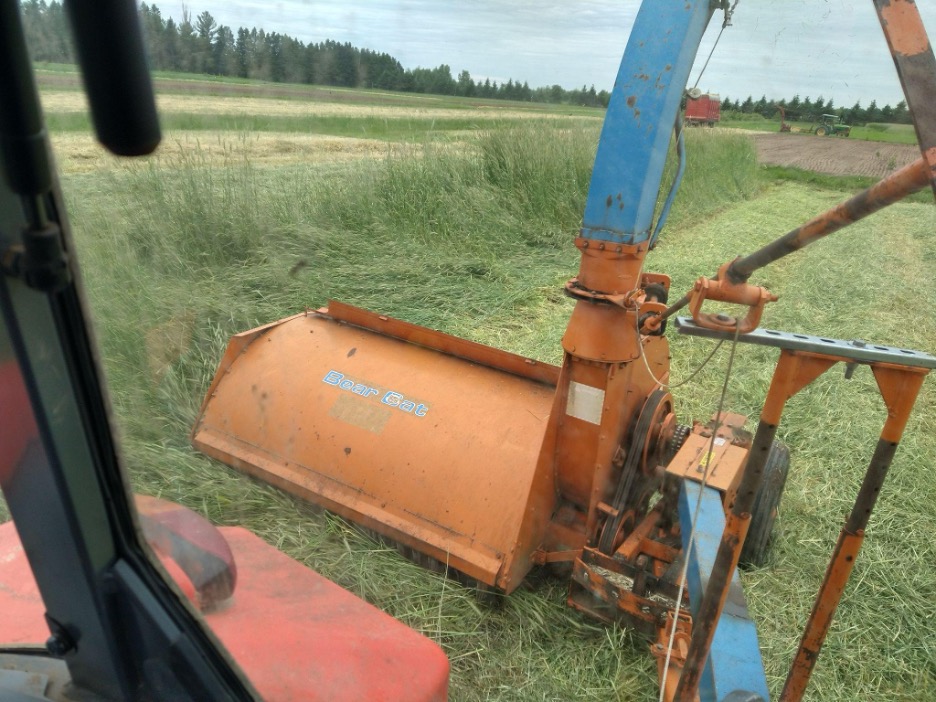
Figure 2. Chopping lodged rye with a flail mower. The back of the mower (out of view) is removed so that the rye drops on the ground rather than being blown up the chute.
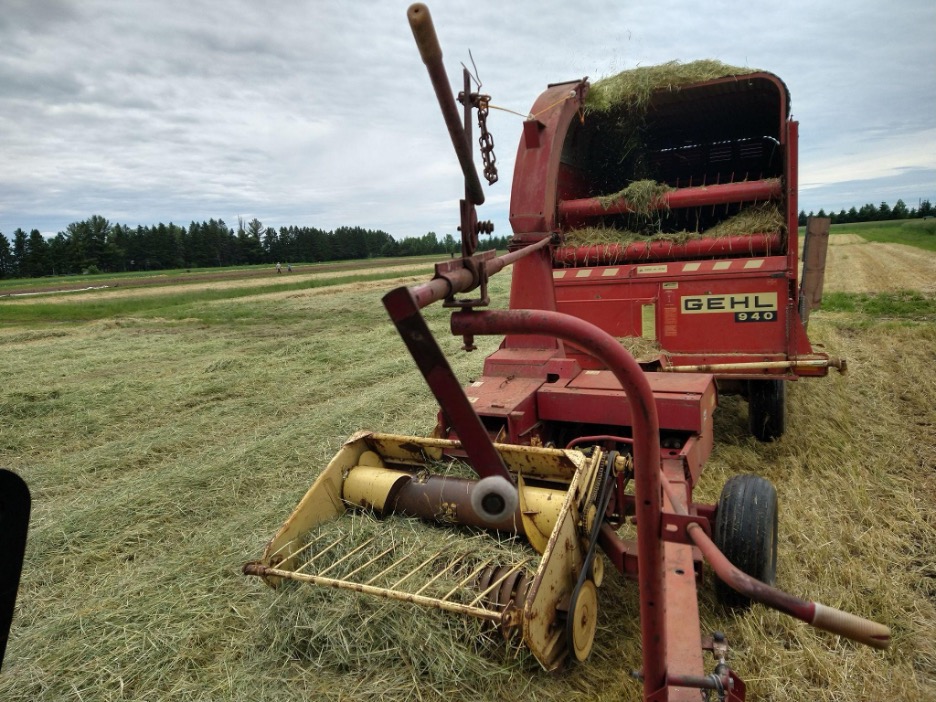
Figure 3. The second pass: picking up the greenchop with a pick-up header and mowing it a second time with the flail mower before it’s blown into the chopper box.
Watch The Rye Mowing Process
Typically, he chops the rye the first day, then comes back the next day to pick up and spread the mulch; leaving the rye to dry for a day helps to prevent the pile in the chopper box from heating up. He also lets some of the greenchop dry fully in the field, then rakes and bales it to use on other crops, such as fall-planted garlic, and in the greenhouse where using a tractor isn’t feasible.
Before mulching, he cultivates the tomato beds once or twice at a shallow depth and hand hoes between the plants. Using a hand crank broadcast spreader, he seeds Dutch white clover at about 20 lbs per acre in the pathways to serve as a living aisle. Depending on his rotation the following year, he sometimes includes Italian ryegrass in the mix (Figure 4). Walking in the aisles during the mulching process helps to establish good seed-soil contact, and overhead irrigation ensures the clover and ryegrass establish well.
To spread the mulch, Janaki drives the tractor over the top of the tomato beds with the chopper box in tow. Two people follow behind. One person shields the transplants from the greenchop with a snow shovel while the second person spreads the mulch evenly around the plants by hand, aiming for a layer about 6” thick (Figure 5, video).
According to Janaki, it is important to ensure that the soil has warmed up sufficiently before adding the mulch. “If you mulch the tomatoes right after you plant them, it just insulates that 55-degree soil, and the tomatoes really don’t like it,” he explained.

Figure 4. The tomato field about one month after mulching, with clover and Italian ryegrass coming up nicely in the pathways.
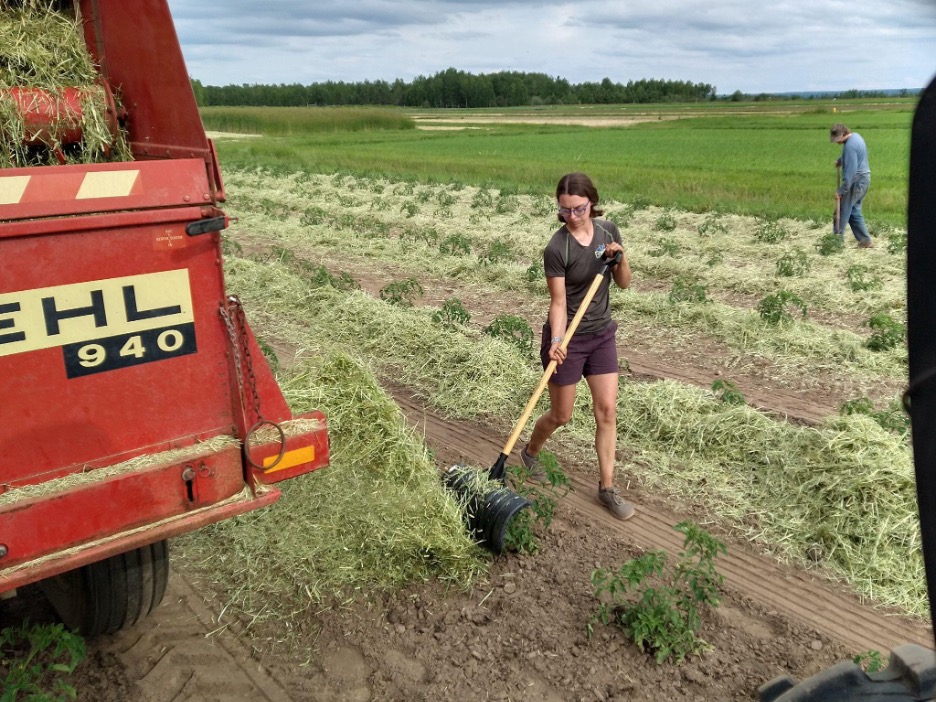
Figure 5. Delivering mulch to tomato transplants using the conveyor on the chopper box. One person protects the plants using a snow shovel while another person follows behind and spreads the mulch with a rake (background). The wheel and foot traffic helps the clover and ryegrass seed make good contact with the soil.
Watch The Mulch Spreading Process
Because mulch generates heat as it decomposes, some farmers may worry about burning transplants by using greenchop for mulch. Fortunately, Janaki hasn’t had issues with the greenchop “going hot.” He attributes this to the high carbon content of the rye at the time of harvest—when it’s fully headed out—and how quickly the layer of mulch at 6-8” thick dries out once it’s on the beds. Even material that has been chopped directly and not left to dry in the field doesn’t hurt the transplants.
End-of-Season Winter Rye Cut-and-Carry Mulch Management
At the end of the season, Janaki leaves the rye mulch on the tomato beds. The Dutch white clover and ryegrass are left to overwinter and grow into the tomato beds the following year through the mulch residue, creating a uniform cover crop.
In addition to using mulch in beds, Janaki also uses the greenchop in the pathways between rows of onions and melons grown in black plastic (Figure 6). The chopper box is modified with a chute that delivers the greenchop to the pathways. The chute, made of scrap sheet metal, is attached to the chopper box with carabiners for easy removal. If he can time the beaters to unload the greenchop without piling up at the bottom of the chute, he can do the job alone. Otherwise, he says, someone follows along and spreads the mulch with a hay rake.
“I hate dealing with the pathways,” he said. “They always get weedy. You cultivate them half a dozen times. The water runs off the plastic, and it can’t soak in very well because you’ve been running over it. But when you put rye mulch on there, the field is really, really nice.”
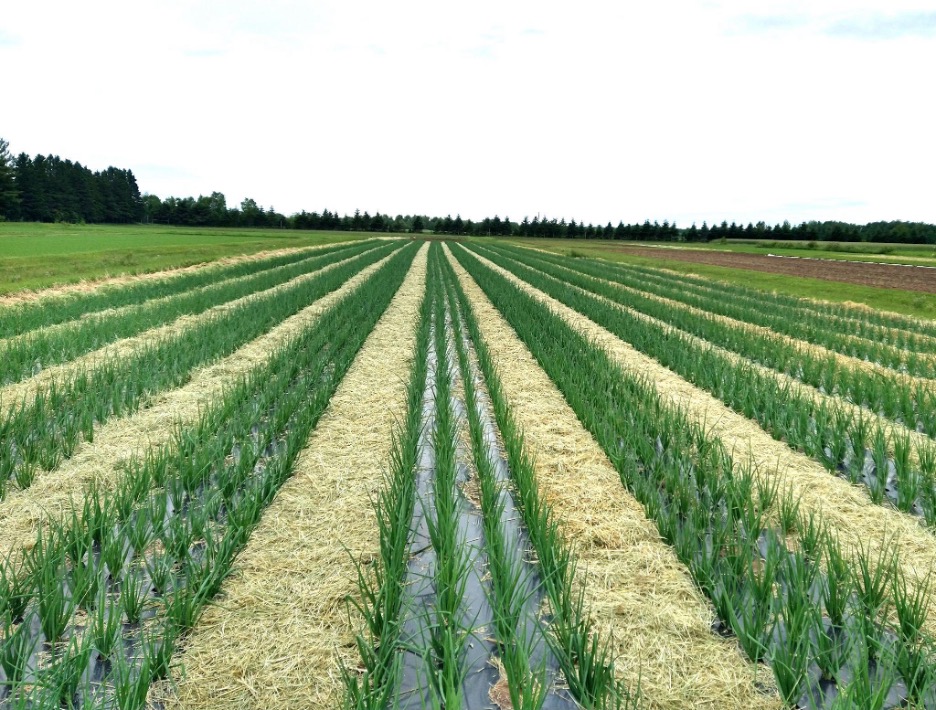
Figure 6. A beautifully mulched field of onions.
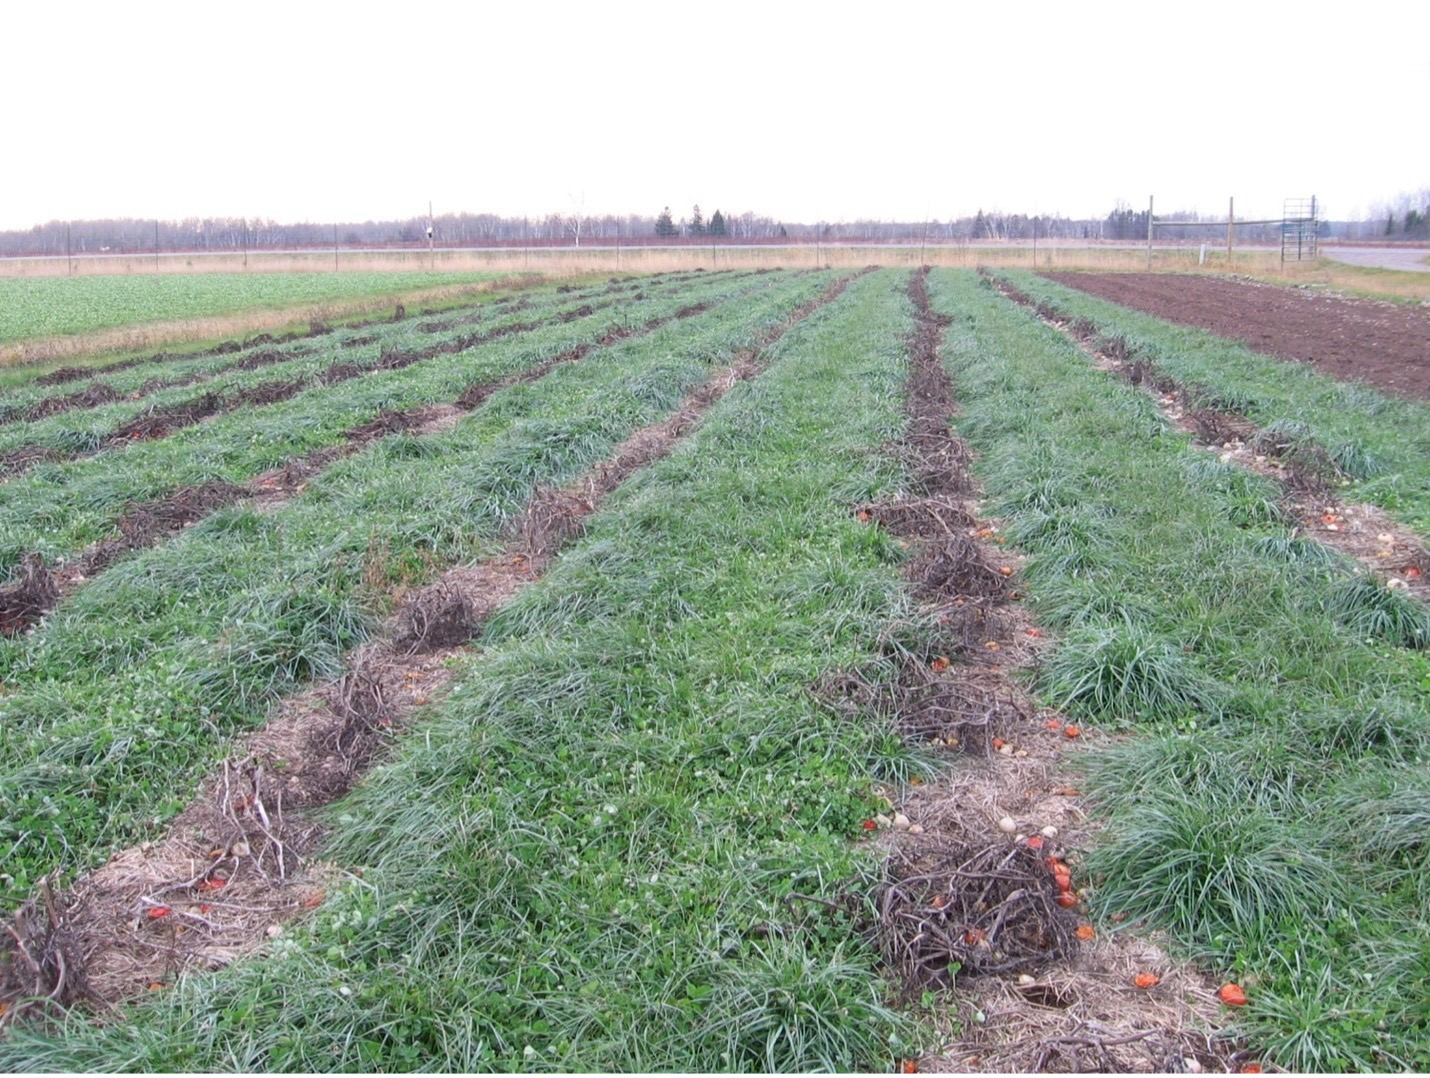
Figure 7. The tomato field in the fall, after plants have been removed. The clover and Italian ryegrass in the pathways overwinter and fill in the mulched beds the following year.
After the plastic is removed, he disks and harrows the field to redistribute the mulch, speed the decomposition process, and incorporate the rye into the soil, which helps create a beautiful tilth (Figure 7).
Production and Application Rates for Winter Rye Mulch
Mulch production varies a great deal based on how tall and thick the rye is. Janaki generally gets anywhere from 5-10 wagon loads per acre from a good stand that is 5 to 7′ tall. In 2024, he used about one forage wagon load per 380 feet of pathway between onions or melons. The tomatoes don’t require as much mulch, so he covered about 450 bed feet per load. The garlic took one small square bale per 20 bed feet.
According to Janaki, the biggest challenges of cut-and-carry mulching—perhaps unsurprisingly—come with the equipment. “If the rye is too tough or too long, it gets wrapped around the front beaters. It doesn’t load very well or it wears out the bearings. That’s a real hassle. And, you know, [chopping the rye] just takes a bunch of time.”
But, he said, “I love the way the soil feels the following year. It’s worth it, even though it’s a lot of work all at once.”
Case Study #2: Scotch Hill Farm, Brodhead, WI (Tony Ends)
Tony and Dela Ends ran Scotch Hill Farm, a certified organic farm in Brodhead, WI from 1994 until 2017. On their 5-acre farmstead and 41 acres of rented land, they produced organic vegetable crops, small grains, hay, straw, and pasture. They also had two high tunnel greenhouses, two cold frame greenhouses, and two late-winter greenhouses for starting transplants.
For over 20 years, they provided fresh vegetables to central Wisconsin through their CSA. Tony reluctantly left farming in 2017 to pursue an off-farm job that paid a higher salary and offered a pension so that he could comfortably retire later in life.

Figure 8. Tony showing brassicas mulched with switchgrass during a tour of Scotch Hill Farm.
During his farming career, Tony worked to optimize a cut-and-carry mulch system using large round bales of switchgrass (Figure 9). His system involved unraveling the layers of the round bales onto vegetable beds and planting into the mulch layer.
This work was the basis of a SARE grant project (FNC12-857) from 2011 to 2012, which he recounted at a recent meeting of our community of vegetable growers interested in practices to reduce tillage.

Figure 9. A round bale of switchgrass used to mulch vegetable beds.
Choosing a Switchgrass Cut-and-Carry Mulch System
Tony’s experiments with mulching started about five years into farming with straw he baled from their own small grains. He later became familiar with switchgrass when his neighbor asked him to cut and bale a 20-acre field he planned to use as mulch for his asparagus, strawberry, and raspberry crops. In exchange for cutting and baling, Tony kept half of the bales, which provided him enough to mulch his crops for two years.
Persuaded to give it a try, Tony started growing about 3 acres of switchgrass on a rented field and selling small bales of the surplus straw to community, school, and backyard gardens in Madison.
Switchgrass, a native perennial prairie grass that produces deep roots and a lot of above-ground biomass, has several advantages over wheat and oat straw as a mulch, as Tony found in a previous study funded by SARE (FNC08-742): it’s weed free; it harbors very little to no plant disease such as mold or rust; its low carbon-to-nitrogen ratio means it breaks down more quickly over the winter and doesn’t tie up nitrogen; and, as a perennial, it can be harvested for 10 or more years without replanting.
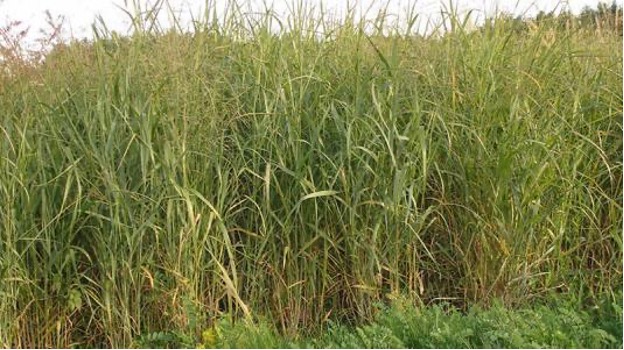
Figure 10. Switchgrass in summer.
The ability to reduce off-farm inputs, while also improving soil organic matter and tilth was a major draw for Tony to incorporate switchgrass into their system, he said.
“With a yield of 120 bales per acre and a sales return higher than people were paying for small bales of hay, and with very little equipment needed after the first 2 years of establishment (just mowing and baling once a year), it was well worth my effort and production expense.”
He also liked switchgrass as an alternative to black plastic mulch. He had concerns about the ecological effects of using plastic and wanted to avoid having to pull up the plastic at the end of the season, as required by the National Organic Program.
“Straw mulch helped us avoid many back-breaking hours of black plastic mulch removal by hand each cold fall—when we were so tired and ready for the season’s end.”
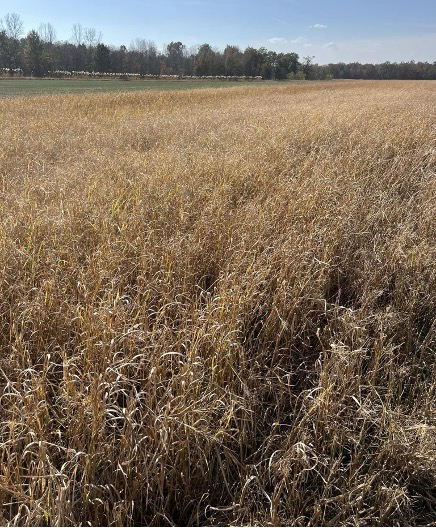
Figure 11. A field of switchgrass in November, around the time Tony harvested for mulch.
Managing a Switchgrass Cut-and-Carry Mulch System
Switchgrass takes 2-3 years to establish. For the first two years, Tony mowed the field twice each season with a rotary mower to prevent weeds from going to seed. Beginning in the third year, he harvested and baled the switchgrass each November, around Thanksgiving, after successive frosts had caused the grass to die back and drop its seed, ensuring that the stalks were dry and any seeds from the switchgrass or weeds had been shed so they didn’t volunteer in the vegetable beds.
“Every year the switchgrass came back denser and better established. In the 5th year at harvest, the grasses were chest high and golden. There were no weeds anywhere in the field.”
He cut the switchgrass with an All Crop Harvester that threw the straw into windrows. He kept the stalks long so that the plant material would roll out as an intact layer. The same day or the next day, he would bale the switchgrass using a Hesston 550 round baler (Figure 12). The bales were loaded onto a flatbed wagon with a bale spear attached to a bucket tractor and stored in his barn over the winter. He found that fall harvested switchgrass rolled out better than switchgrass harvested in the spring, which tended to be more fragile and prone to falling apart as the bales unraveled.
Prior to laying the mulch and about 6-8 weeks before transplanting, he spread goat and sheep bedding over the beds, which he incorporated into the soil by tilling with a 50” rotavator set to a depth of 2-4”. Drip tape laid over the bed served as a centering guide when rolling out the round bales of switchgrass mulch.
To roll out a large round bale, he drove a large metal rod through the center of the bale with a sledgehammer. He then attached ratchet straps to each end of the rod and ran them through the three-point hitch/arms of his JD 3020 tractor. Then, he lowered the 3-point hitch to the desired height and slowly drove the tractor over the beds while layers of switchgrass peeled off the bottom of the round bale like a roll of toilet paper (Figure 13).
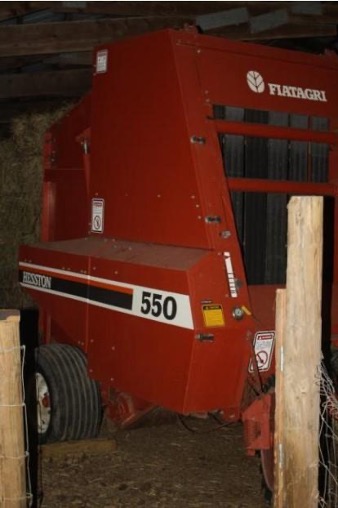
Figure 12. The Hesston 550 round baler Tony used to bale his switchgrass.
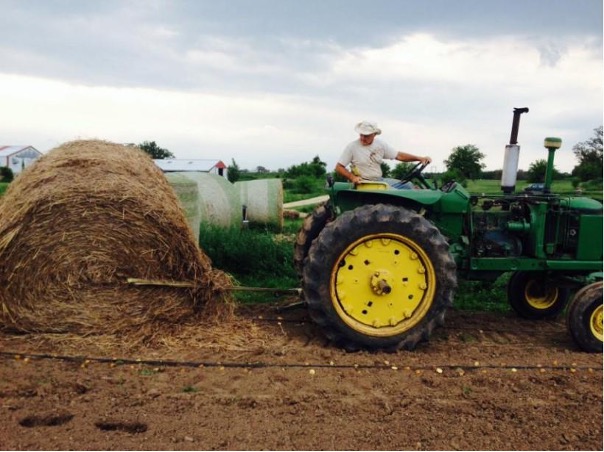
Figure 13. Tony rolling out a bale of switchgrass on a vegetable bed using ratchet straps attached to each end of a large metal rod driven through the center of the bale and run to the three-point hitch on his tractor.
The result was a mulch layer about 2 to 3 inches thick, sufficient enough to conceal the soil but not enough to provide thick cover for chipmunks and ground squirrels that rob certain vegetables. For the rodents that did find cover, his Jack Russell Terrier had no problem routing them out.
“I highly recommend a good Jack Russell Terrier in tandem with prairie grass mulch. They patrol with a vengeance,” he said.
Application Rates for and Transplanting into Switchgrass Mulch
A single 1,000 lb. round bale covered about two 100-foot double rows, plus the walking path in between. Because the thickness of the layers would vary as they came off the bale, someone would follow behind the tractor and even out the mulch layer by hand or with a rake.
Tony transplanted many different crops into the mulch, including tomato, cabbage, Brussels sprouts, and peppers. To penetrate the dense blanket of switchgrass straw, he used a waterwheel transplanter modified with fully-removable extension spades (welded by his son) bolted onto existing points on the wheels (Figure 14).
He ran into some issues with the bottoms of the seats on the transplanter catching and dragging the mulch, leaving gaps. To remedy this, he cut out large pieces of cardboard that were fit around the metal rungs of the seat post and held in place by the riders’ feet. These “sleds” helped the transplanters glide over the dense mulch without disturbing, catching, or dragging apart the mulch (Figure 15).
Tony also successfully grew potatoes in the mulch. He simply planted the seed potatoes into the beds and then rolled out the mulch on top.
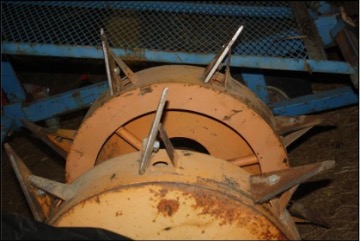
Figure 14. The modified wheels of the waterwheel transplanter showing the extension spades bolted onto existing points on the wheels.
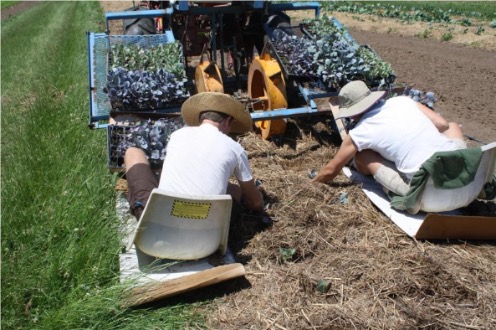
Figure 15. Transplanting into switchgrass mulch, with large pieces of cardboard fit around each seat post to keep them from catching and dragging apart the mulch.
He noted that some weed varieties, especially thistles, were eventually able to penetrate the mulch as well but, by the time they emerged, the transplanted vegetables were usually thriving.
When asked to reflect on his system of cut-and-carry mulch, Tony offered: “This question should be asked of any practice in whatever system of agriculture. Does the practice increase dependency on a non-renewable resource? Does it cut costs or only increase other costs? Does it require cleanup of ground and surface water? Does it build resistance of weeds? Pests? Does it accumulate in the soil, in my body or the bodies of neighbors and loved-ones? Does it drift onto neighboring land? Does it acidify and compact soil? Is its efficiency truly for me, or for someone else? Working prairie grass mulch solutions into an organic vegetable crop system created benefit after benefit—reduced weeding costs, plastic mulch removal costs, soil fertility costs, rotational requirements—that all tended toward a healthier and healthier whole farm system.”
Conclusion
While mechanizing cut-and-carry mulch has worked well to suppress weeds and improve soil organic matter for some, there are still plenty of challenges when fine tuning the process to the challenges of a specific environment.
For example, one farmer who experimented with cut-and-carry mulch found himself unexpectedly mowing his alfalfa/ grass mixture with a sickle bar mower when the flail mower he had planned to use was broken. While the sickle bar mower laid the residue down flat really well, the grass was too long to be useful as mulch and frequently got bound by the finger weeder he used to cultivate the beds.
Finding sufficient space can also be a challenge. While Tony managed his switchgrass on rented land, he noted that the long-term commitment of establishing and maintaining a perennial crop—coupled with proper vegetable rotation—could be done more successfully if one owned the land.
For those with the space and energy to experiment, mechanizing a cut-and-carry mulch system is an excellent way to reduce labor while increasing the resiliency of soil on a farm. Inventive tools—like Tony’s waterwheel points—make use of equipment on hand, while surely there are plenty of tools yet to be developed. Our community of practice convenes monthly to share insights on what’s working (and what isn’t) for farmers in the Upper Midwest. For more information, or to join the conversation, visit Climate Resilience for Organic Vegetable Production.
Updated: May 1, 2025
Reviewed by: Rue Genger, Anne Pfeiffer